
How to create a gift certificate purchase page with a PayPal pay link
Currently, most pet business online scheduling systems do not have built-in gift card functionality. However, you can use your website and a third-party payment provider, such as Square or PayPal, to create a purchase page and thank you page for your gift card.
This post walks you through how to add gift certificate purchases to your website by incorporating a PayPal pay link button on a website page.
The customer experience
This is the process your website visitors will go through when they purchase a gift certificate.
- On your Gift Certificate page, they’ll select the gift certificate amount and add the recipient’s name & email address, who we should say it's from, the preferred delivery date, and an optional note to the recipient.
- They’ll pay with a PayPal account or debit/credit card.
- They’ll be returned to a Thank You page on your website.
- They’ll receive an email receipt from PayPal.
- The recipient will receive a custom email from you with a custom gift certificate code.
Setting it up
To set this up, you'll take these steps, which I'll go through in more detail next.
- Create a Gift Certificate purchase page on your website.
- Create a Thank You page on your website
- Create an email template that you'll send to the recipient.
- In your PayPal Business account, create a PayPal pay link. Use the Return URL option to return customers to the Gift Certificate Thank You page.
- Create a spreadsheet of custom redemption codes & who they're assigned to.
- Promote the Gift Certificate product page through a button, text, or as a menu item elsewhere on your website.
- Promote the Gift Certificate product page on social media.
Step 1: Create a Gift Certificate page
Start by adding a dedicated page on your website with information about the gift certificate. Include the text you’d like, any supporting images, and a purchase button that links to your PayPal purchase page. We'll build the purchase page shortly.
Click the button below to view my example page. You can also click the “Purchase” button to preview how the PayPal purchase page will look. Important: This is only a demo. If you complete the checkout, you will not receive a gift card (your payment would simply be a non-refundable donation to me).
Step 2: Create a Thank You page
In this setup, once someone purchases your gift certificate, they’ll be redirected to a Thank You page on your website. This page should confirm that the payment was successful and clearly explain what happens next — including how you’ll deliver or fulfill their gift certificate.
Step 3: Create the gift certificate template
There are several ways to provide a gift certificate. You might choose to mail a physical card or send one by email. In this setup, which works well for businesses like mine that don’t sell a large volume of gift certificates, I use an email template. For each purchase, I simply update the template with the recipient’s gift card details and send it directly to them. You can see an example of this email template in your Spring Break Marketing Toolkit.
Step 4: Create a PayPal pay link
From your free PayPal Business account, follow these steps:
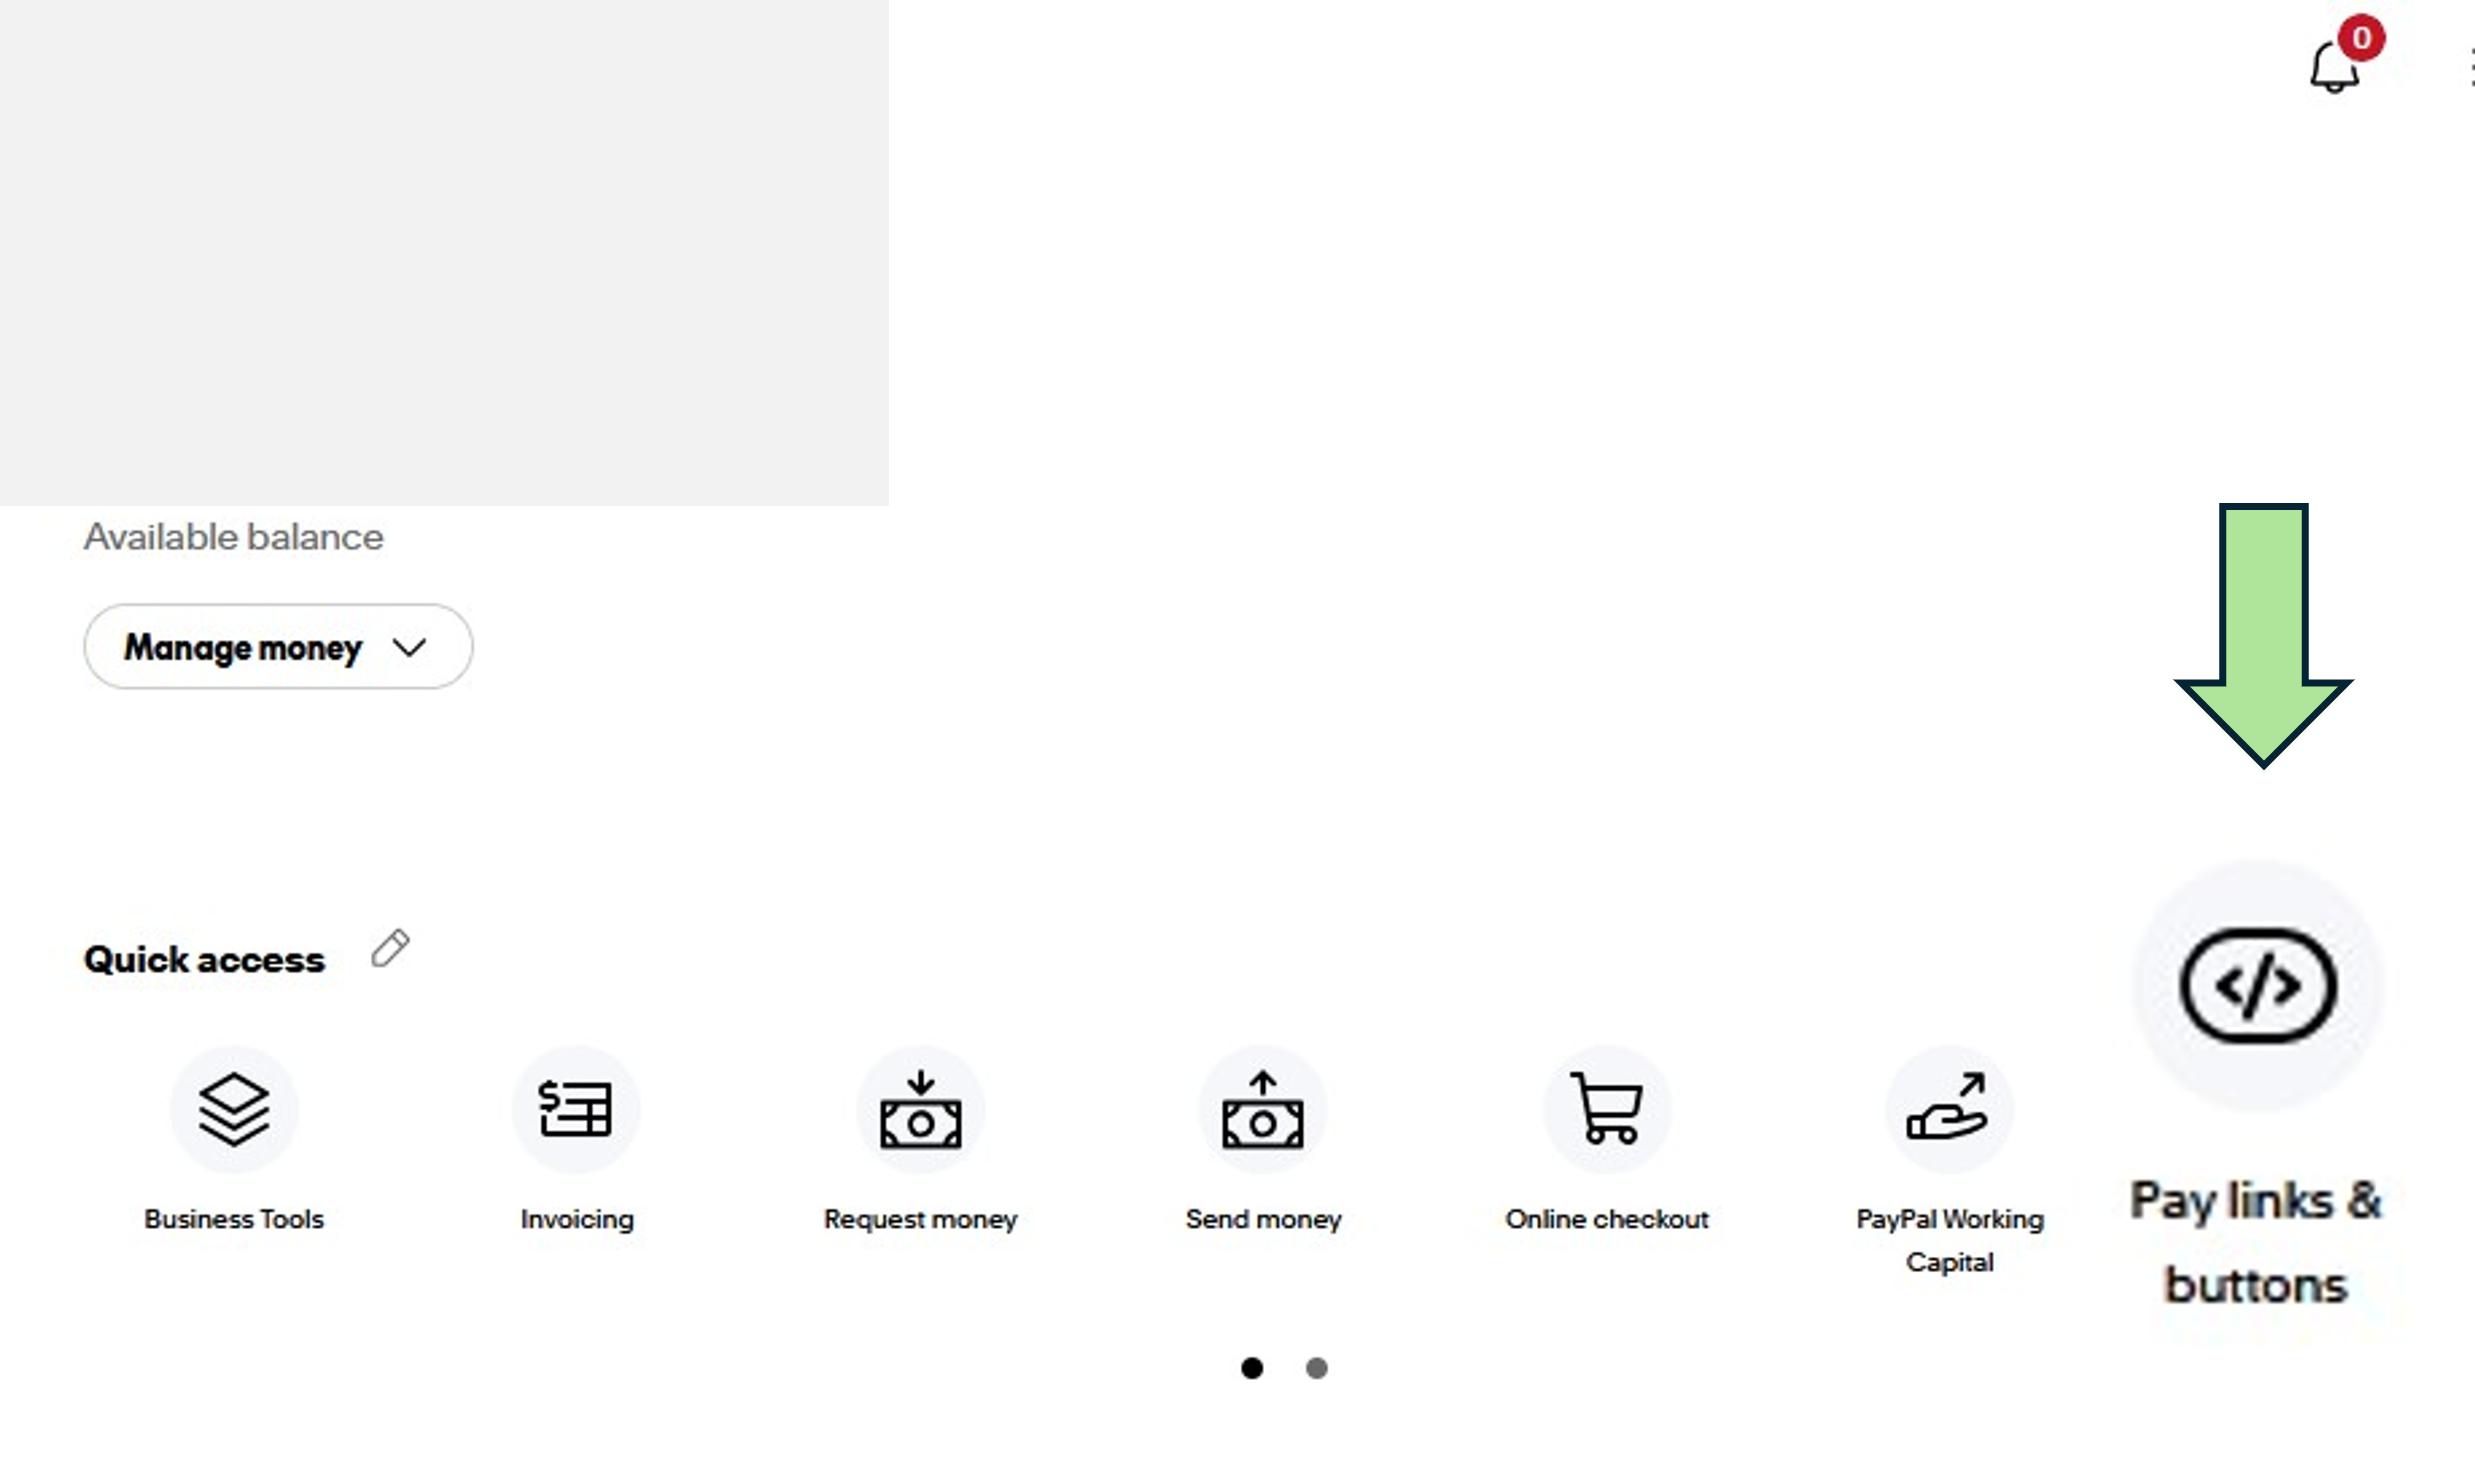
- Click Pay links & buttons
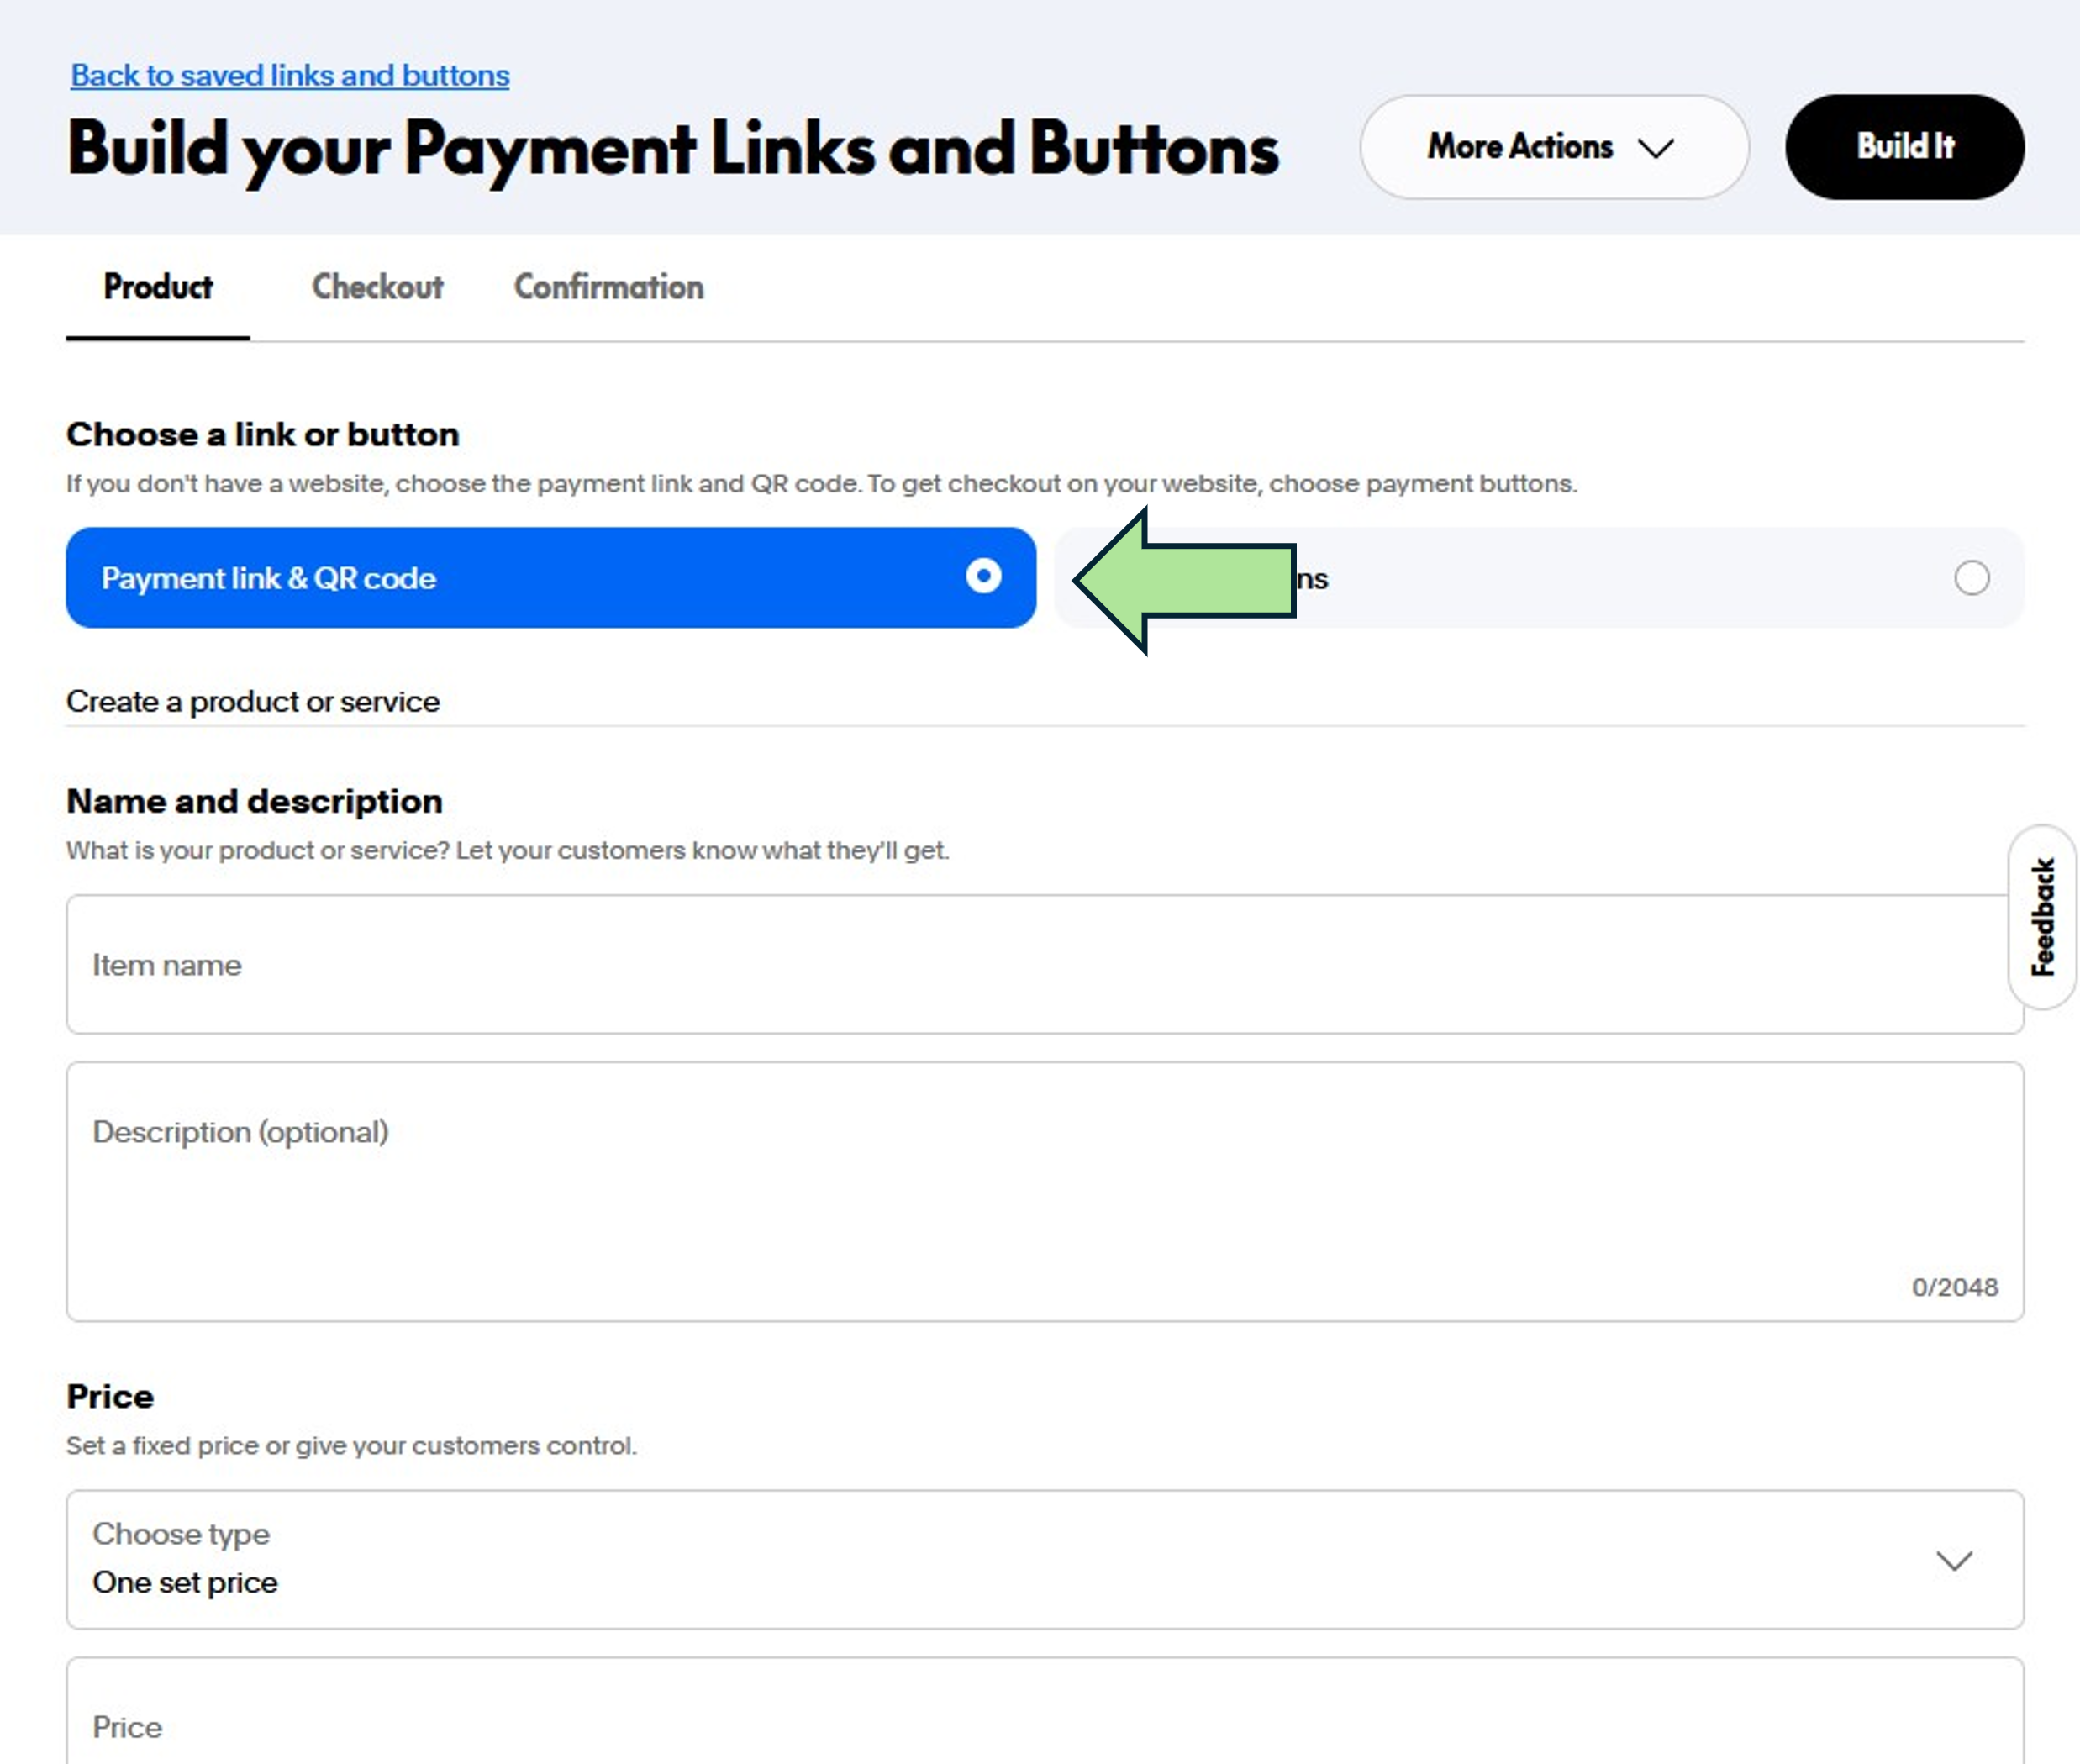
- Select Payment link & QR code
- Add the product name & description. I recommend:
- [Business Name] Gift Certificate
- Give the gift of stress-free pet care. [Business Name] gift certificates can be applied to any of our services—from dog walking to pet sitting. Perfect for birthdays, holidays, or spontaneous ‘just because’ moments. Because peace of mind is the best gift for both pets and their people
- You can either choose One set price or you can let the customer choose the dollar amount. I've chosen One set price and added variants with different $ amount options. We'll go over how to do this shortly.
- Click Show More Options
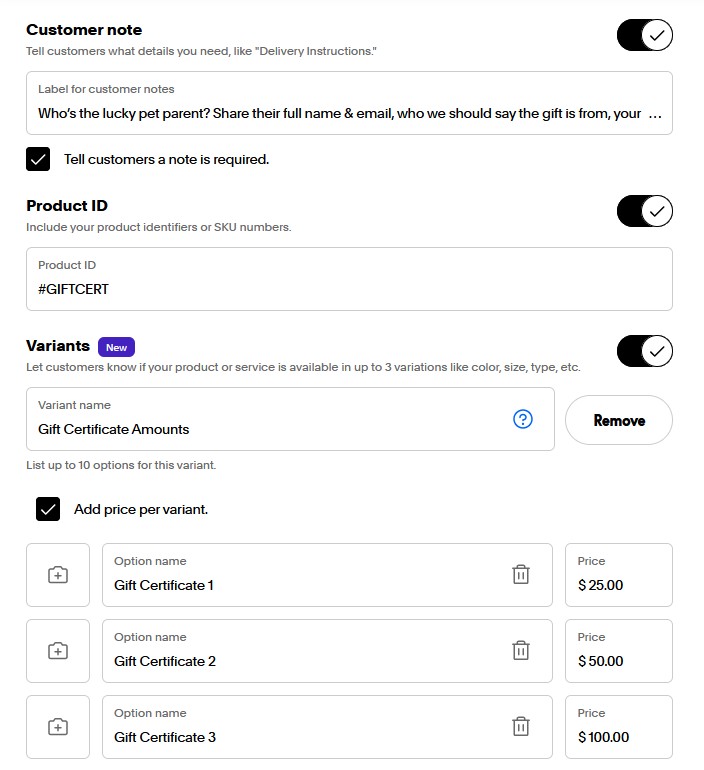
- Toggle on the Customer note and check "Tell customers a note is required." This is where you will ask for the recipient's information. I suggest this verbiage:
- Who’s the lucky pet parent? Share their full name & email, who we should say the gift is from, your preferred delivery date, and a note to make their gift extra special.
- Who’s the lucky pet parent? Share their full name & email, who we should say the gift is from, your preferred delivery date, and a note to make their gift extra special.
- Toggle on the Product ID and add a product identifier.
- If you chose the One set price option, toggle on the Variants to add more gift card options. You can be more creative with the option names if you'd like.
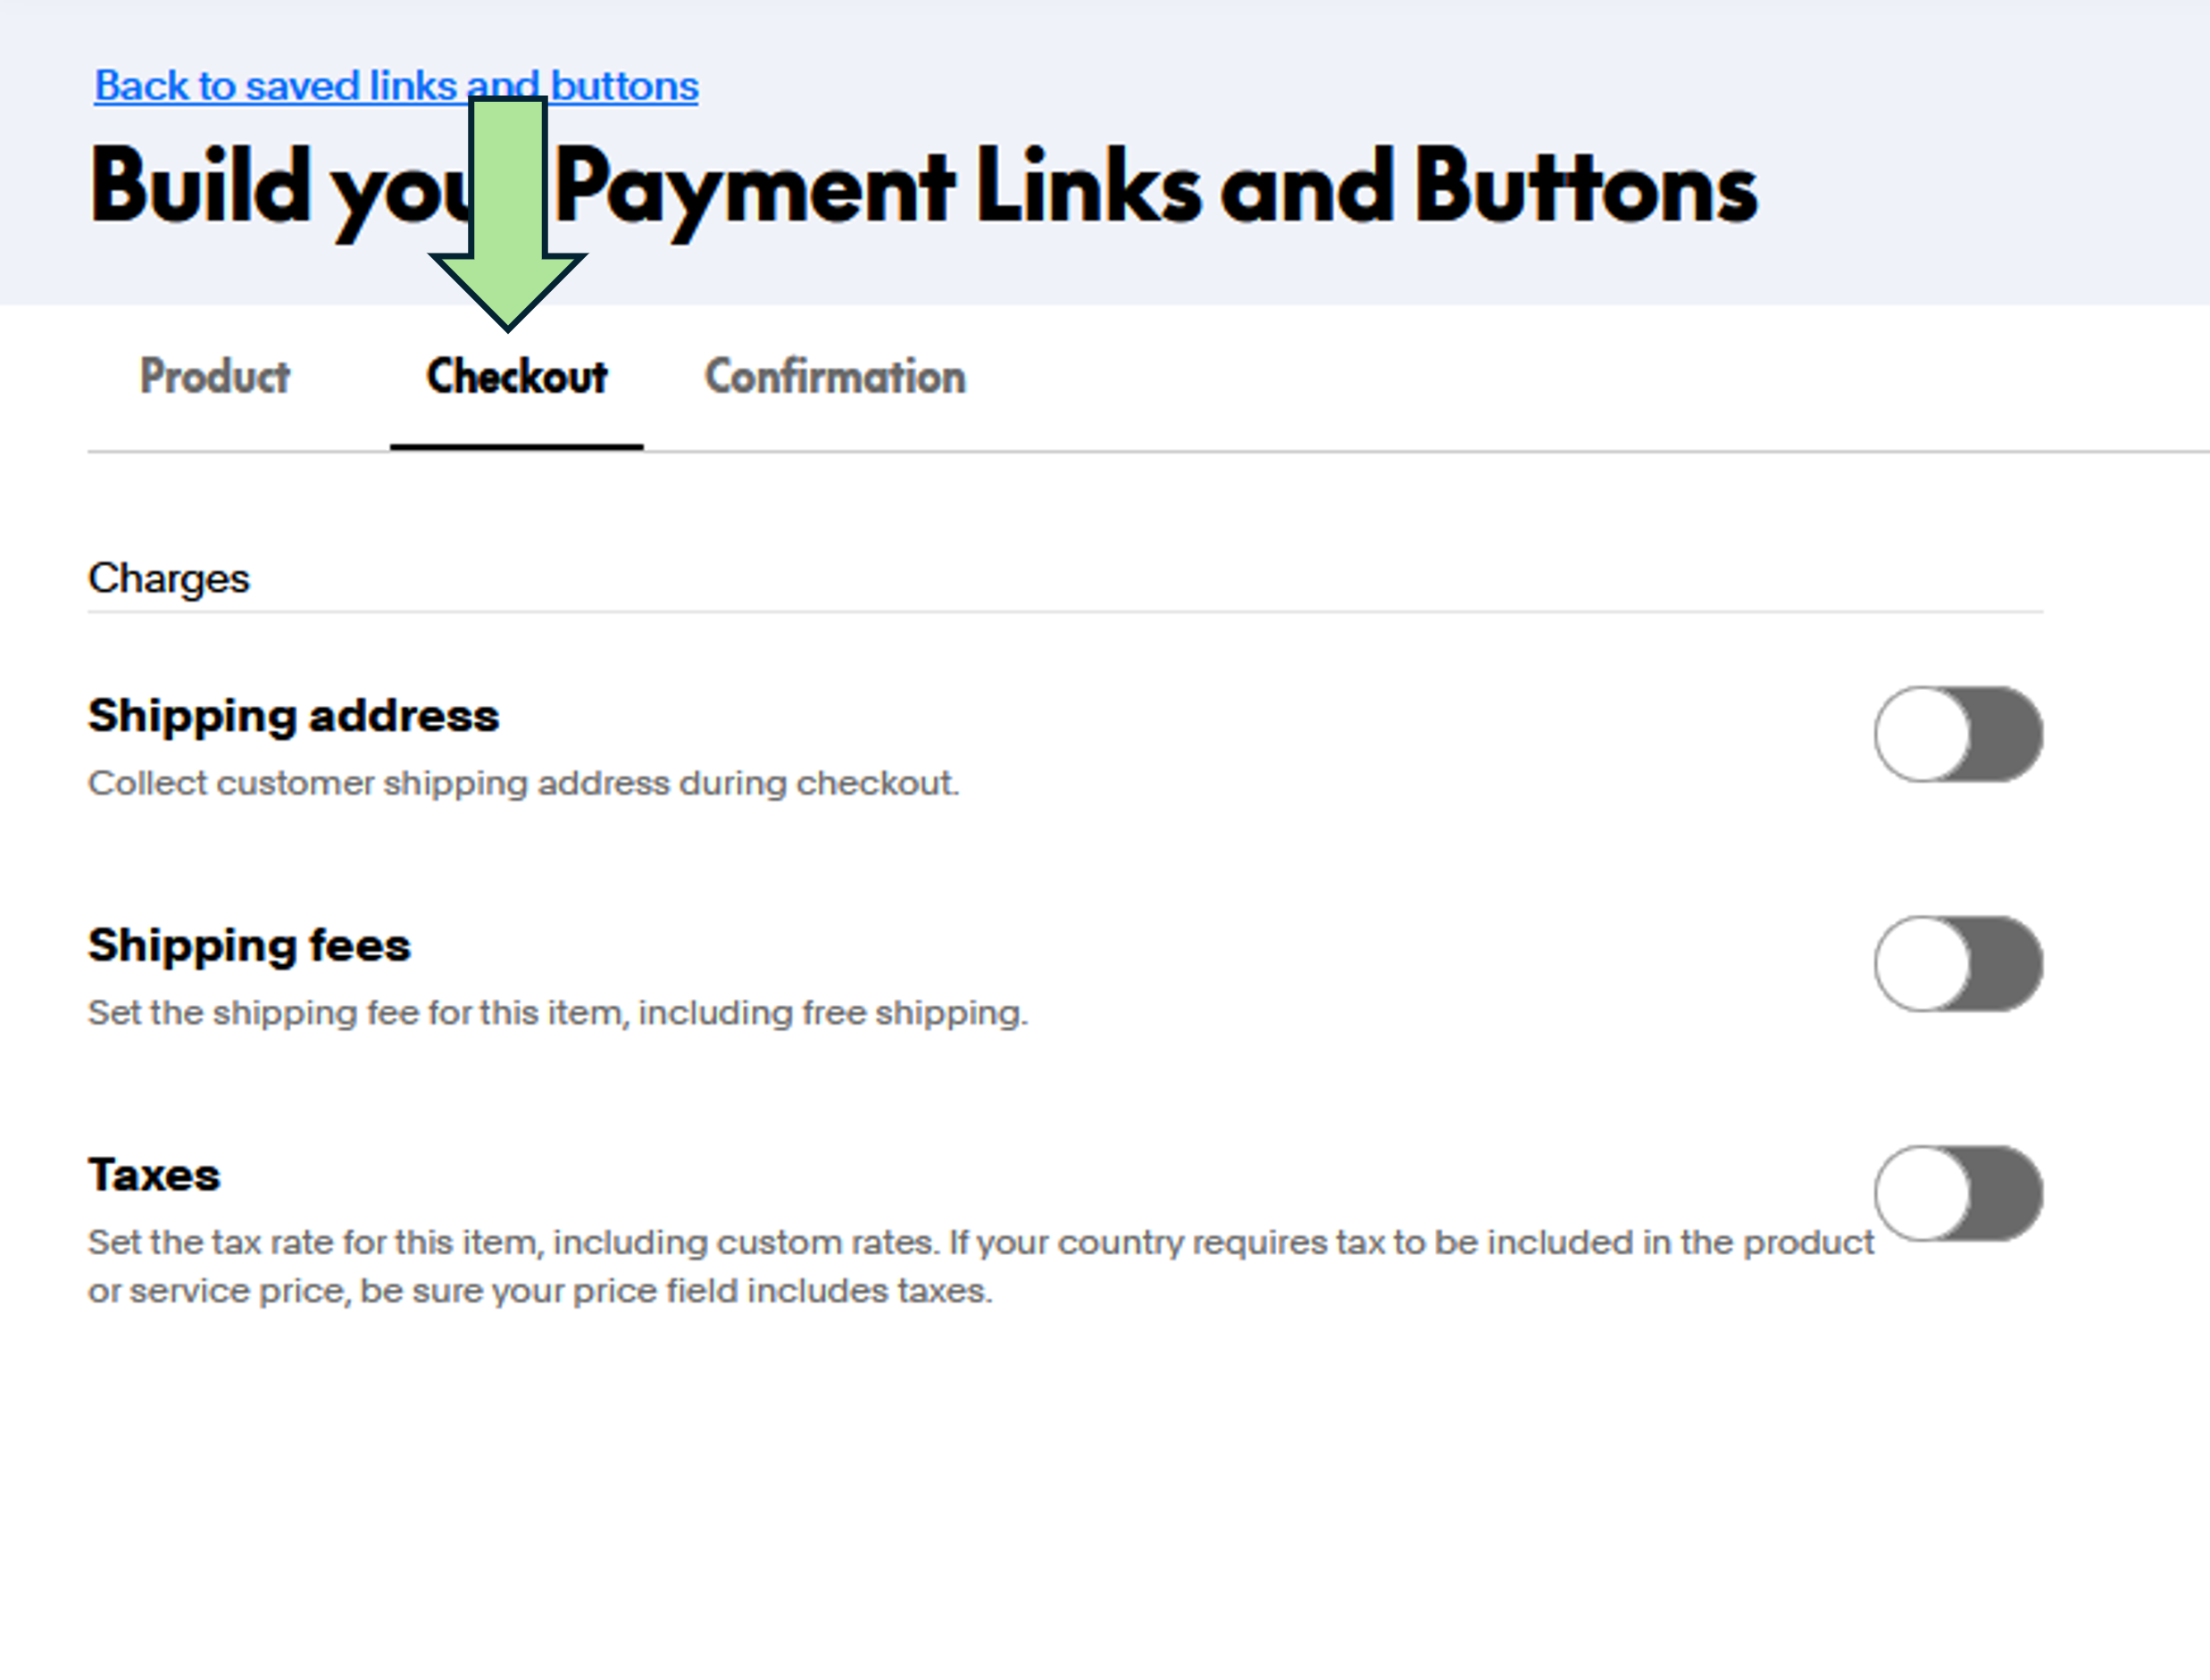
- Click on the Checkout tab
- Toggle off Shipping address
- If you would like PayPal to tax the purchase, toggle on Taxes here and add the tax rate %.
- Next, Click on the Confirmation tab and and toggle on Auto-return URL. Input your website's gift certificate page URL or another page of your choice.
- Save your changes by clicking the Build It button at the top of the page.
- Copy the Pay Link
- Then click Edit
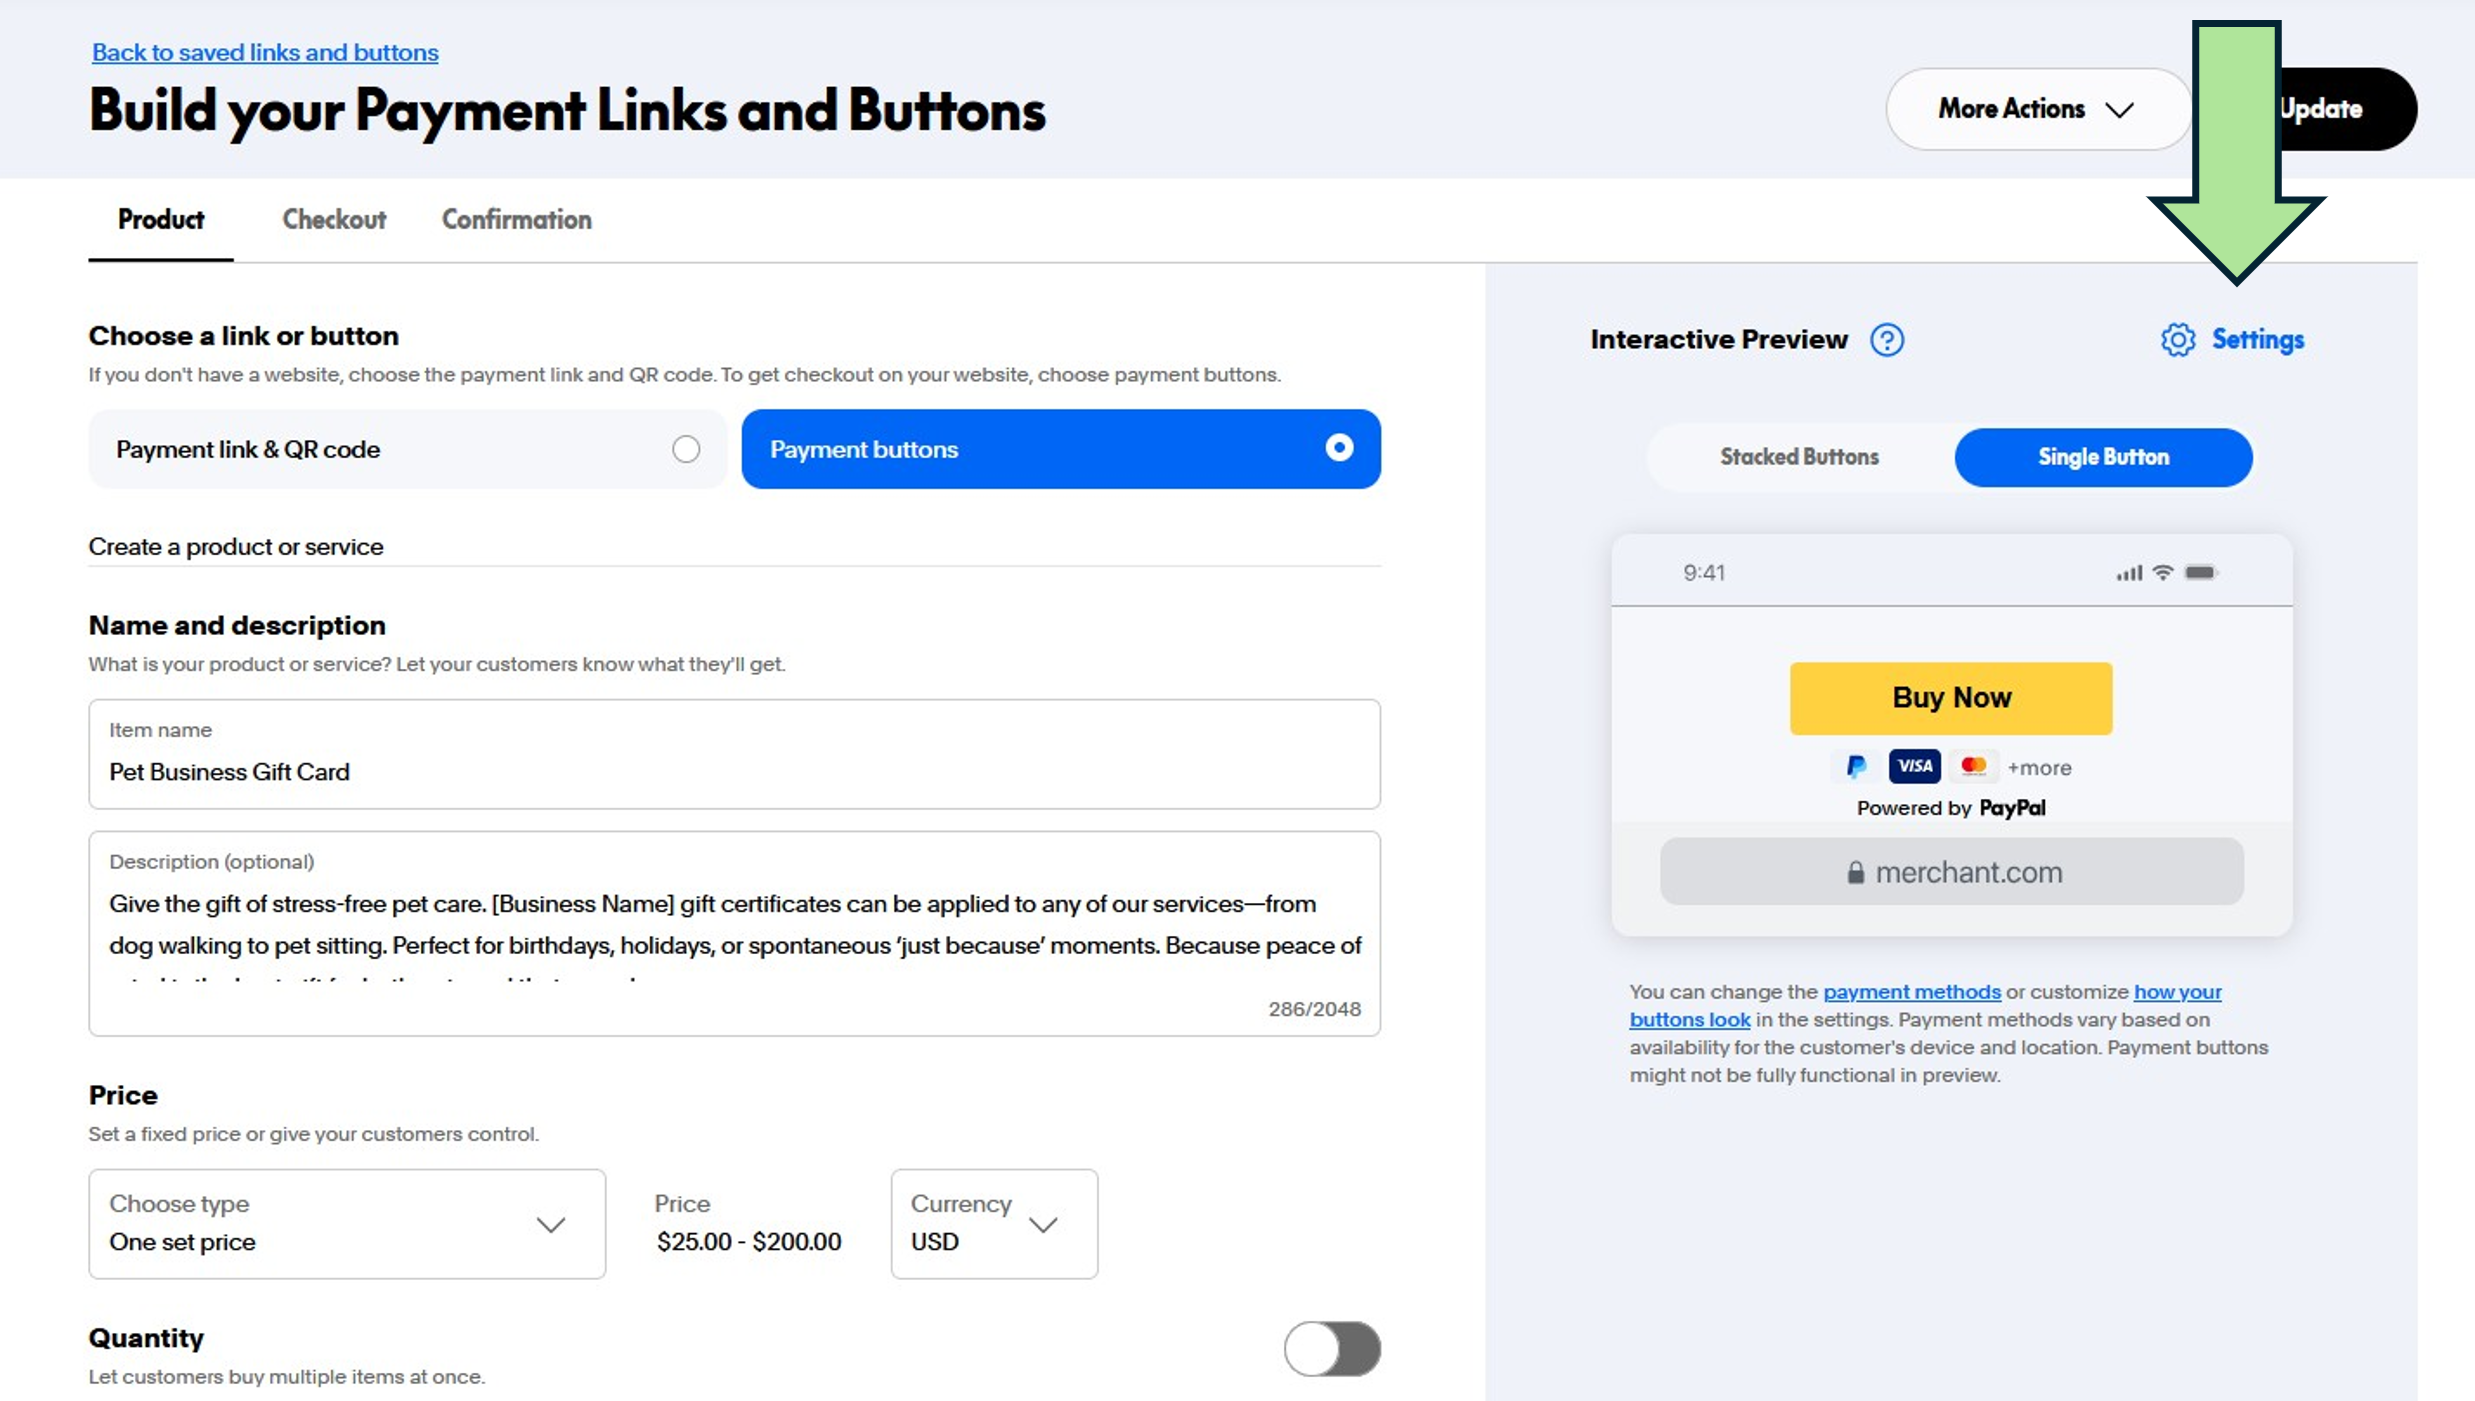
- Click on Settings
- Choose they payment methods you'd like to accept
- Under Business name and logo, toggle on Show your business name and Show your business logo
- Add your Homepage URL
- If you'd like, you can change the color and size of the purchase buttons using the Stacked buttons & Single button tabs.
- Finally, Click on the Cart buttons tab.
- If you'd like, change the color and size of the cart button.
- Add an Auto-return URL This will apply to all shopping cart transactions, so I recommend returning them to your website's Home page.
- Save your changes
- Add the Pay Link URL to your website's Purchase button.
Step 5: Test your PayPal Gift Certificate button
☐ Set a Test Amount
- Add a very low amount (e.g., $1) to your purchase button for testing.
☐ Log Out
- Log out of your PayPal business account and your website.
☐ Open as a Visitor
- Visit your Gift Certificate page in a browser as if you were a customer.
☐ Run a Test Transaction
- Use a different PayPal account (such as your personal account) to complete the transaction.
- Check both a cancelled transaction and a completed transaction.
☐ Confirm Success
Verify that the transaction goes through correctly and that the Thank You page displays as intended.
☐ Finalize the Button
Return to PayPal, remove the test amount option, generate the final button code, and place it back on your website.
Yay! You're ready to start selling!
Copyright 2021 - Privacy Policy